For those adults that train and struggle with their belts or for parents watching your child’s belt constantly lag behind them, a string of toilet paper dragging the floor… I’ve got you covered.
Tying a Karate belt the correct, traditional way may still not be the best if you or your child are having trouble with belts being too tight or falling off. The 3 key fixes are:
- keeping the knots tight
- tucking one end through the layers of the belt
- keeping a hand sized space between you the belt when tying
There still is a lot left to learn about how to implement these tips. There are also different types of belts, tipped or striped belts, and several ways to wrap and tie the knots. Not to mention, the type of Gi (Karate or Judo) or Dobok (TaeKwonDo, TangSooDo, or HapKiDo) does sometimes make a difference.
If you have a collection of belts and don’t know what to do with them or are planning on getting one, here is how I have always displayed mine and my kid’s belts. Check it out here on Amazon.
Now, let’s sneak into the first topic like the ninjas you are. . .
Contents
- Tips To Tying Tightly
- Why Does an Overly Tight Belt Wrap Cause Breathing Problems?
- Let’s Get To Some Wrapping and Tying Already!
- Yeah, But How Do I Tie The Belt For My Child? It’s All Backwards.
- What If There Are Stripes or Text On the Belt?
- Issues Solved For Different Types of Gis and Doboks
- The Karate Belt Tying Takeaway…
Tips To Tying Tightly
(Absolutely Awesome Alliteration)
So, before we jump into the exact how to portion here, let’s look at a few pointers to help with the basics. Master Shimabuku, the founder of Isshinryu Karate always stressed that the basics should be mastered before they are ever applied to other parts of Karate.
Tying the knot and how the belt is wrapped do play coordinating parts in whether the belt stays tied during active movement. If the belt is too tight and becomes uncomfortable it is only natural to push it down away from the original spot under the navel where it was tied.
When you change the location in which the belt rides, you are inevitably changing the circumference of the inner part of the loop of the belt in reference to the stomach. This many times causes the space between the belt and the stomach to become too large.
Three things happen at this point.
- The knot is not held in the same amount of tension any longer and movement can cause loosening.
- The size of the belt wrap can gain more and more slack due to movement and slide down even lower.
- The combination of the loosening of the knot and belt slide cause most of the belt untying issues in training.
Either a parent trying to help a child or the student trying to solve the issue will tighten the wrapping of the belt the next time around and further exacerbate the situation. Now it is even more uncomfortable and restricting and will definitely get pushed down, starting the process over.
How do we fix the problem? Simple. Leave a hands breadth between the belt and the uniform when wrapping. Then once the knot is ready to be secured, give two to three quick, hard, equal jerks on both ends of the belt outwards. The knot will be tight enough and the belt will not need to be moved from its original tied position.
This will not be too restricting on breathing and the knot will not be loosened since the circumference of the belt will not be moved and gain slack. The takeaway here is…
- A strong, tight knot
- Don’t overly tighten the wrap
Why Does an Overly Tight Belt Wrap Cause Breathing Problems?
In a study done by researchers from the International University of Health and Welfare, Fukuoka, Japan and the Kobe International University, Hyogo, Japan the amount of expansions in the thorax and abdomen regions of subjects during normal and heavy breathing were measured.
They found that both regions expanded one third as much during restful breathing as during deep labored breathing. The abdomen’s movement was as much and sometimes more than that of the chest cavity. What does this mean for you or your child?
If the belt is wrapped too tightly during a time of restful breath rhythm then you are sure to see restricted breathing during times of stressed, deeper breaths. I know the feeling of being in the middle of a hard sparring match and finding my belt was suffocating me.
If your child is complaining when you help them first tie their belt, then you can bet they are going to get winded quickly and more than likely complain louder when that happens.
If you are finding yourself getting winded while working out in a Gi or Dobok much more quickly than without one, it may not be the reason you once thought. It may be that the belt is restricting your abdomen from regular expansion efforts due to over tightening the wrap.
NOTE: For those with back injuries or sore lower backs. Over tightening the Karate, TaeKwonDo, or Judo belt will not be an adequate substitute for a well designed sports back brace. It may also cause you problems with breathing patterns that you weren’t aware of.
I use a back brace due to to an injury when training. I swear by this one. I actually bought and use this one all the time. If you wan’t to check it out, I got it on Amazon here.
Let’s Get To Some Wrapping and Tying Already!
There are several good ways to tie a Karate belt and many ways to mess it up. One sure fire way to look sloppy and like a novice is to tie your belt with one end reaching up toward your chin.
Little kids do this when they don’t understand how to tie a simple square knot or because they are in a hurry and don’t give it the attention it deserves. For adults either tying their own belts or the belts of children, you don’t have an excuse. No more ugly knots.
Why is it important to not look sloppy when you are going to work out anyway? Aristotle’s idea was that action comes from being. You show your belief and your character through everything that you do, the choices you make.
If your Karate belt knot is lopsided, uneven, and sticking out in a weird angle, it says something about you that you made the choice to either make it that way or leave it that way. The same goes for dirty Gis and Doboks.
As instructors look over classes and the states of the uniforms, we understand by already knowing the students that this is accurate.
#1 Way – The X Wrap
So, let’s do this right. Here is the first way and what some would term the more traditional way of tying a Karate belt. This version has the belt crossing over in the middle of the back as it returns to the front, making an X as it does.
Here Are a Couple of Videos of the X Wrap.
As you can see, in both of these examples the center of the belt was found and the wrap was started from the front just under the naval.
Here Is A Detailed Description With Pictures.
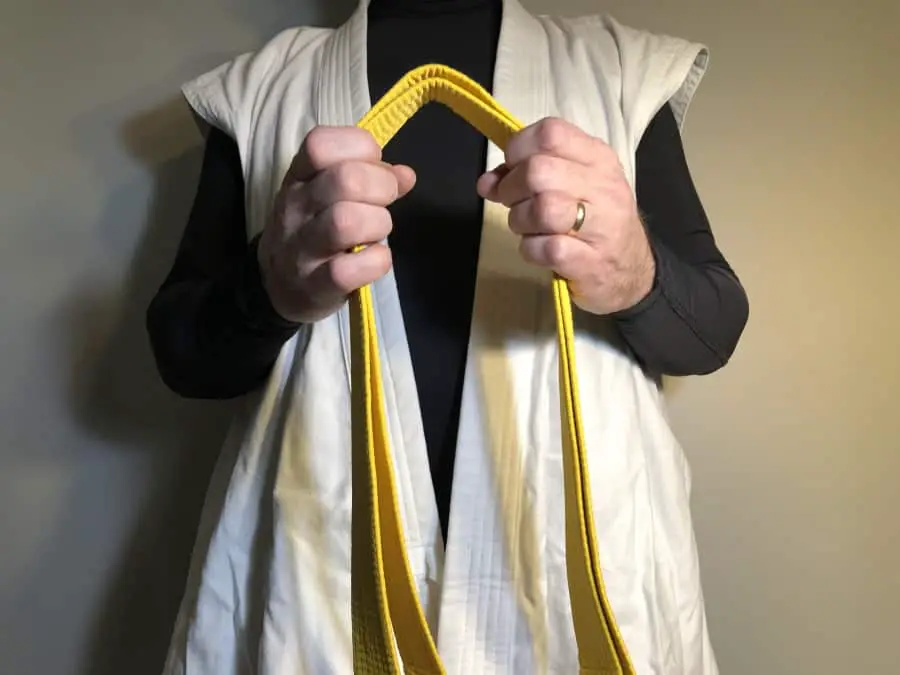
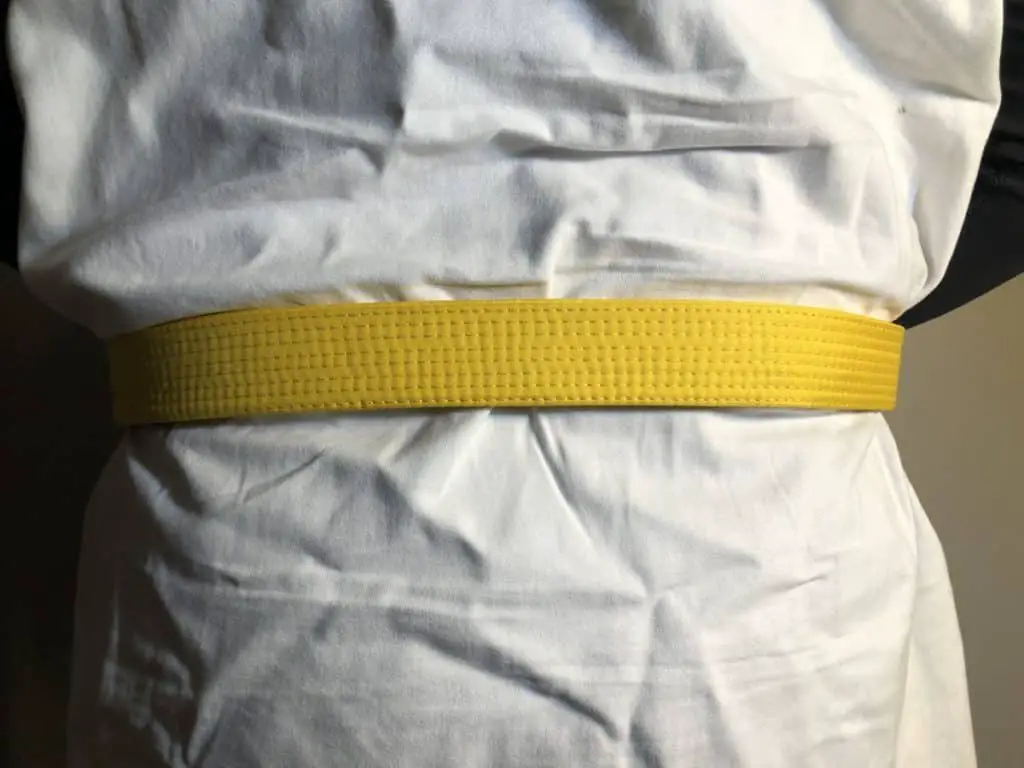
I wanted to find the best contrast for the pictures that I could so I grabbed a new yellow belt and a random Gi top and rash guard. I think the contrast helps you see everything in the photos. Using a new belt will help you see the middle lines easier as well.

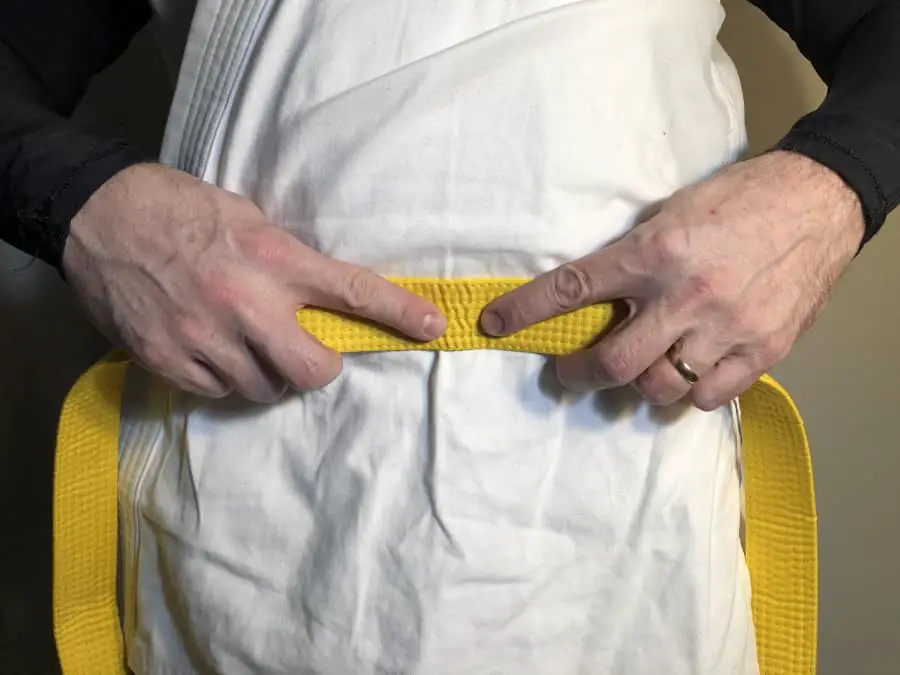
#1 Find the center of the folded belt.
#2 Find the center of the unfolded belt.
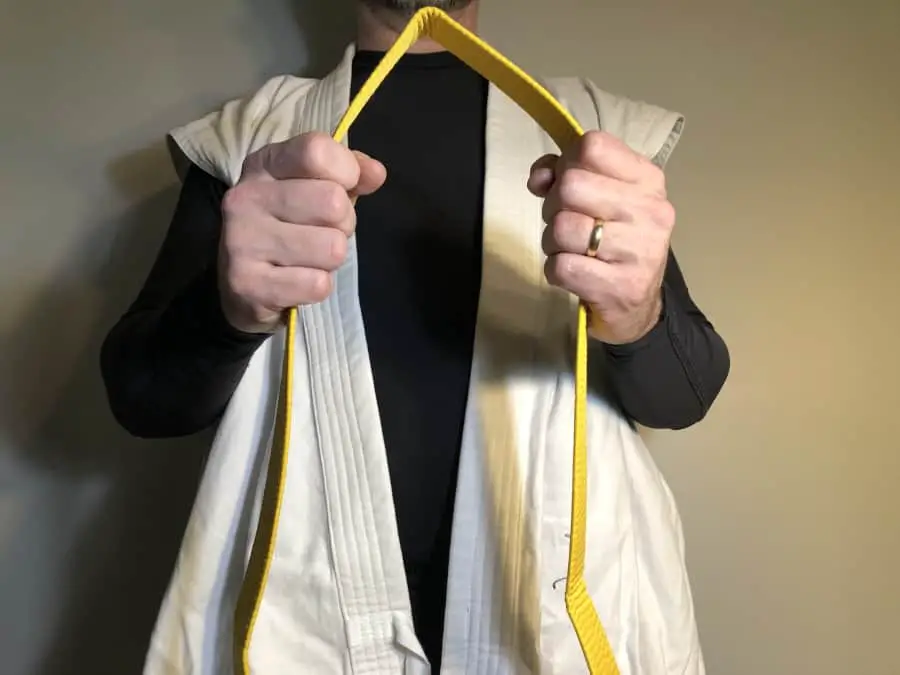
#3 Hold the right side of the front two flaps in toward your left kidney so that it will be the under layer of the front opening of the Gi.
#4 Hold the center of the belt against the uniform in order to hold the left side flap over the first one and keep the Gi closed.
#5 Wrap both sides at the same time around to your back and switch each side to the opposite hand.
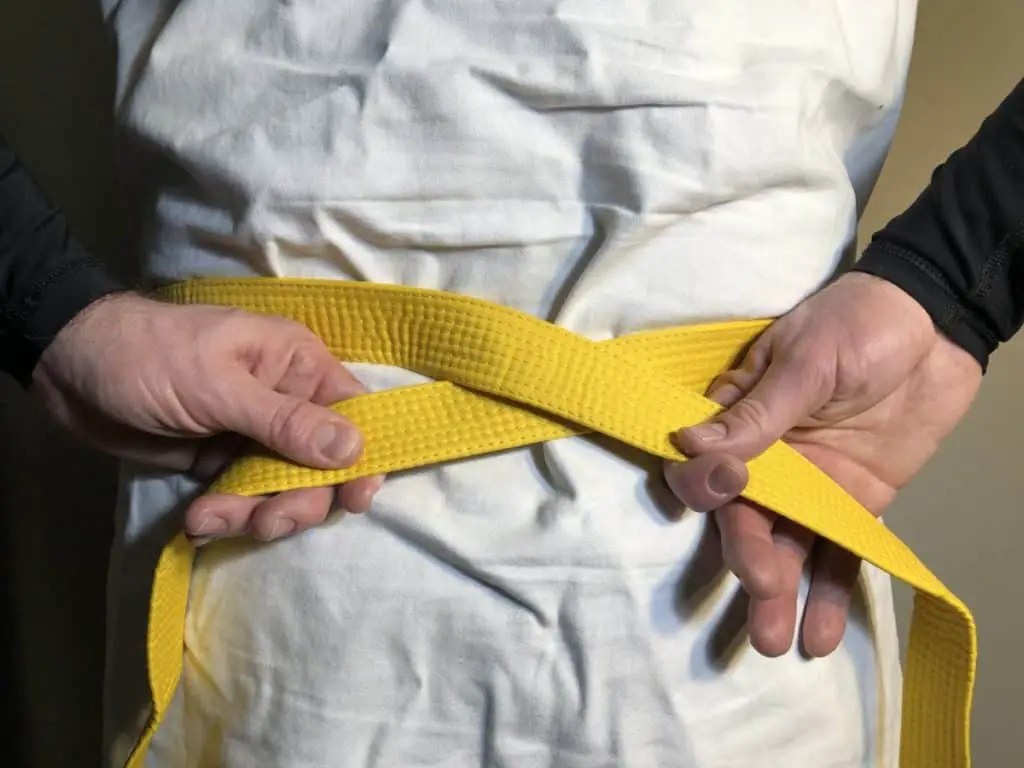
#6 Cross the two sides of the belt over one another crating an X in the center of your back.

#7 Bring both sides around to your sides letting the belt glide through your grip in a way that keeps the belt in place but doesn’t over tighten the cinching affect. This is the ready position to begin the knot.
Now you are ready for the knot. But more on the simplest and most effective knot in a moment. First, should you use the X wrap?
Is the X Version Better or Worse?
Let me get it out of the way right up front. It is not better or worse. It is simply aesthetic choice. What you like or sometimes what your instructor likes will make the decision.
I have rolled for hours with both types of wraps done on my belt with no difference. I have taken full Judo throws and break neck speed from world champion Judoka, and it made no difference. I have competed in point and full contact tournaments and there was absolutely no difference.
When I was a child and at the time taking a couple of Korean style martial arts classes, I was taught that this was an improper version of wrapping the belt around the waist. If you have heard this I can give a bit of insight. I later found out that the Korean masters that taught me saw the X style as a Japanese version of the belt wrap.
The history of the Japanese occupation of Korea, the rather open animosity that the Japanese and Koreans have had toward each other’s cultures over the years, and the attempts at South Korea especially to develop a national identity after said occupation explains a lot here.
The names TaeKwonDo and HapKiDo, two of the most popular and widely known names of Korean styles, are both Korean ‘name swaps’ from their original Chinese and Japanese origins. In that push for national identity, centered mostly around the 1970s, names, words, customs, and methods used in the martial arts were all given Korean significance.
Thus, the X version of the wrap became taboo to some traditional Korean styles or at least certain master instructors. The more ‘orderly’ and aesthetically pleasing streamlined double wrap became their norm.
Is this Japanese connection even an accurate history of this wrap? Could be, but more than likely not. But to some of them it is, so make sure you use the streamlined version if your instructor has a preference.
#2 Way – The Double Wrap
If you are looking to get rid of the X crossover in the back of your belt and there is nothing in your martial arts class that mandates the ‘traditional’ X wrap, then here is the solution for you.
Again, I have noticed this double wrap version much more heavily used in Korean styles, but it is usually not a big deal for it to be used in many schools.
Here Are a Couple Videos of the Double Wrap
Here is a slightly different beginning to the double wrap… Congrats GM Moon for putting a little flair into it. It comes out the same so just use the one that you feel less all tied up about… yeah, I’ve got ‘dad jokes’.
Now For That Detailed Description With Pictures
There are some other variations of this wrap, but this is the simplest. If you are here looking for how to tie a belt, I think that is probably your goal. So here is the way I do the Double Wrap.
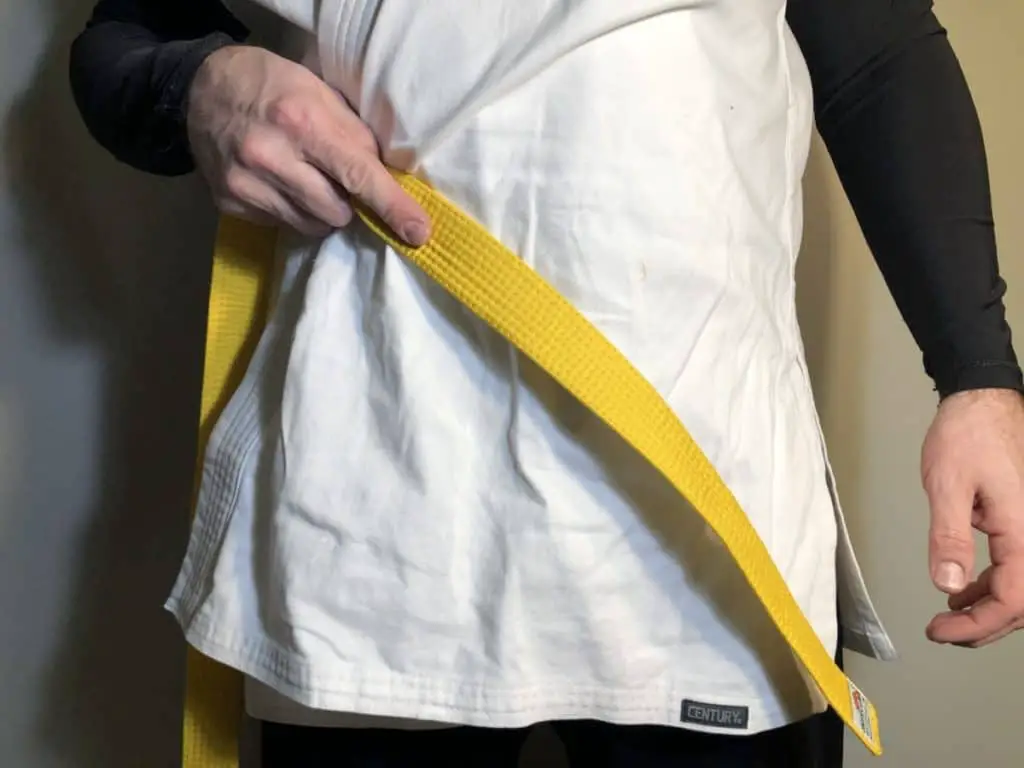
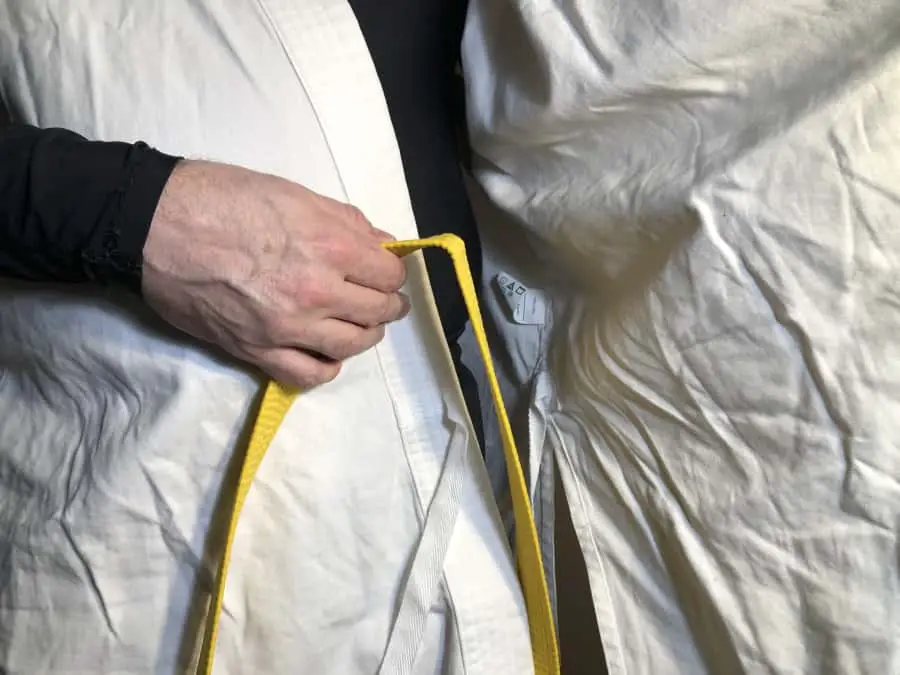
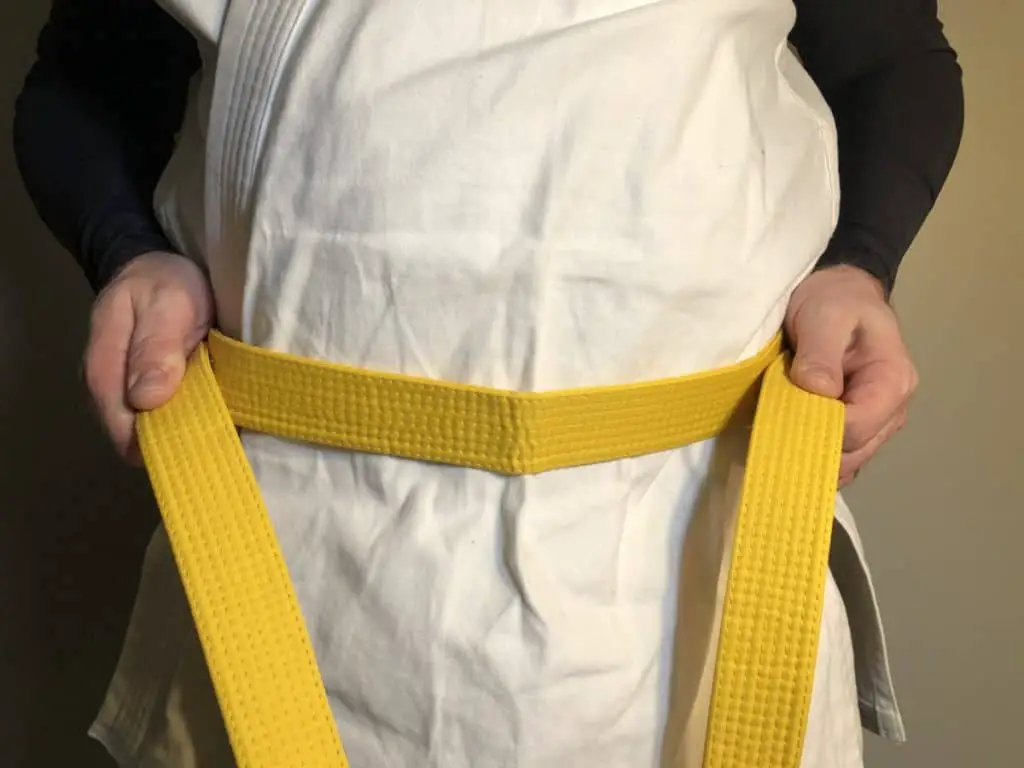
#1 First hold some (many get technical about how much, but a shimmy and a pull will adjust this easily later) of the belt down at an angle pointing to your left.

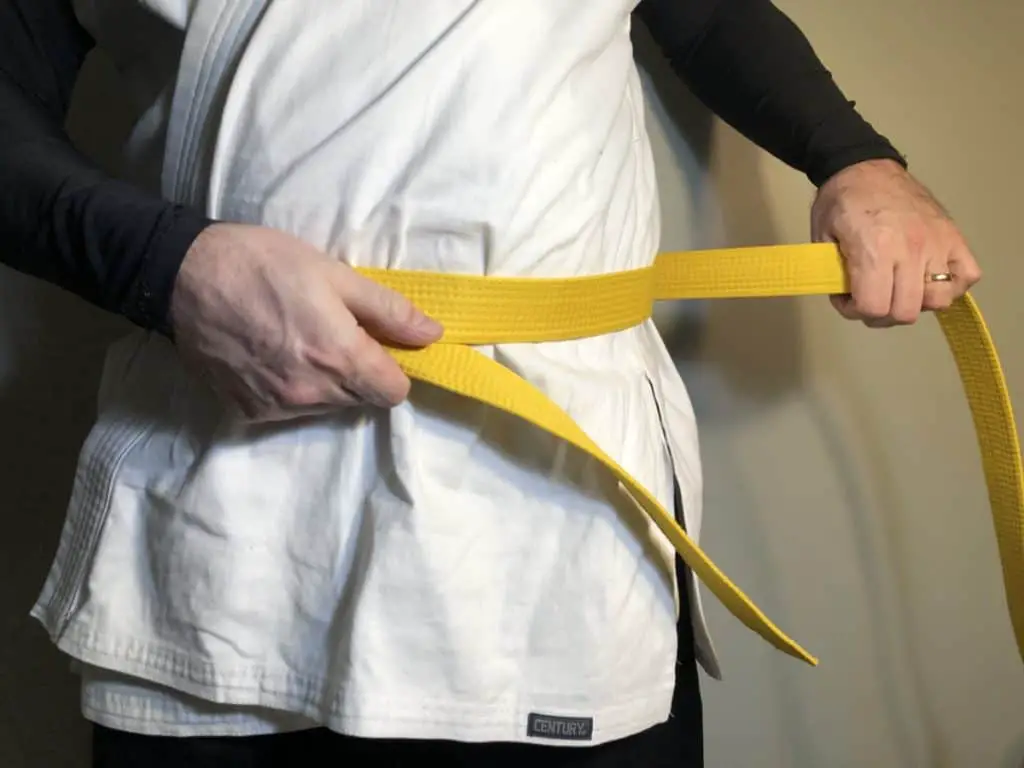
#2 Bring the rest of the belt around your back being sure to keep the material flat against your uniform with no twists.

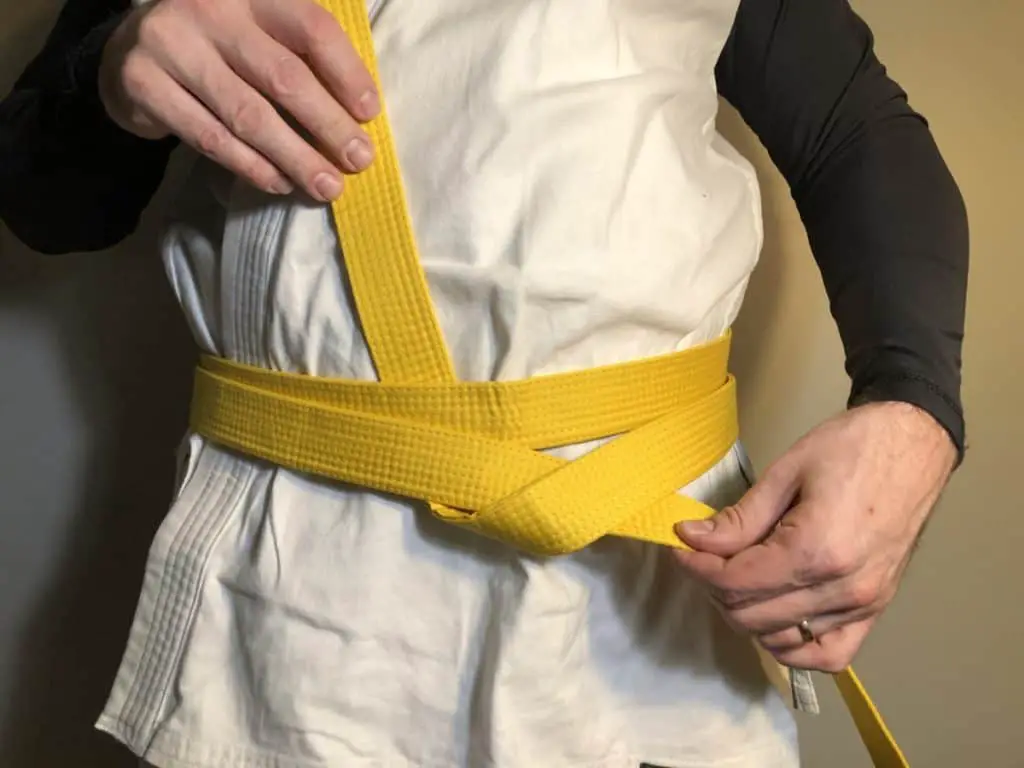
#3 Cross the long portion over the original short portion that is angled to your left. Super Secret Ninja Trick! This step helps hold the original angled off piece in place.
#4 Bring the belt around the back, covering the portion of the belt from the first time around.
#5 LOOK! Magically the X has vanished! This is how the back should look with no twists.
#6 And now we are again to the knot tying ready position. Just be sure to keep a grip on both sides or it will unravel at light speed. You will look like a dog chasing its tail trying to catch it. If this happens don’t worry, we all have chased the belt in a circle or two.
The Knot – This Is A Simple Square Knot
Here is a video with a quality explanation of the double wrap, the knot, the room between the stomach and the belt for breathing, etc. Good video.
Video Explanation of the Belt Knot
Detailed Knot Description With Pictures
This is not really that hard. It is a simple square knot. I give it as a mantra for the Little Ninjas that I teach. It goes like this:
Left Over Right
Underneath All Of It
Right Over Left
Underneath Just the First Part
Pull, Yank, Tug
Me
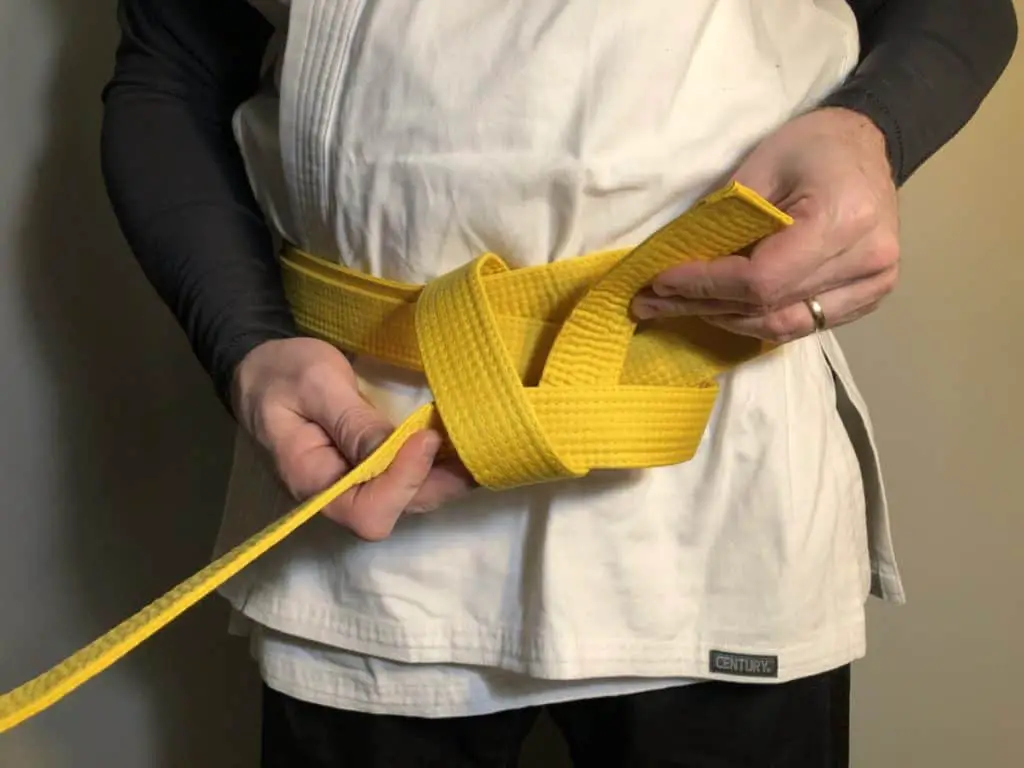
#1 Bring the left side over the top of the right and tuck it under both of the other. I usually check the tightness here. It is easier now and requires less shimmy and shake.
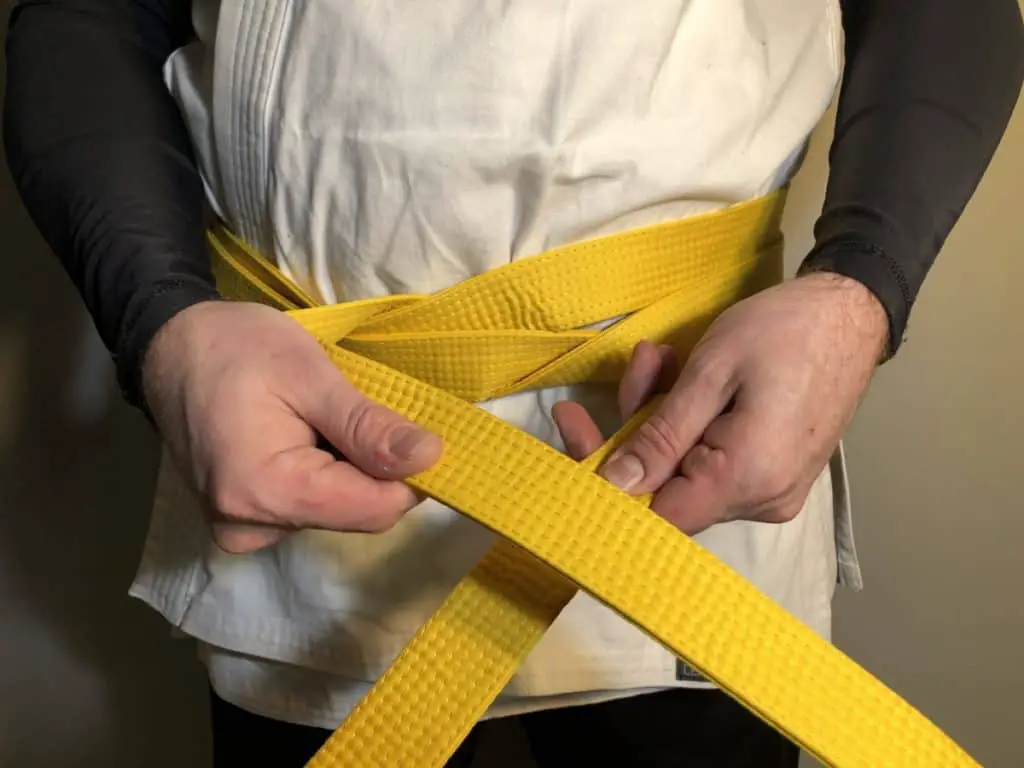
#2 Now, take that same part that you tucked under, which is now the right side and cross it over the left.
#3 Tuck that same piece under and through just the left side and not the other layers around your waist.
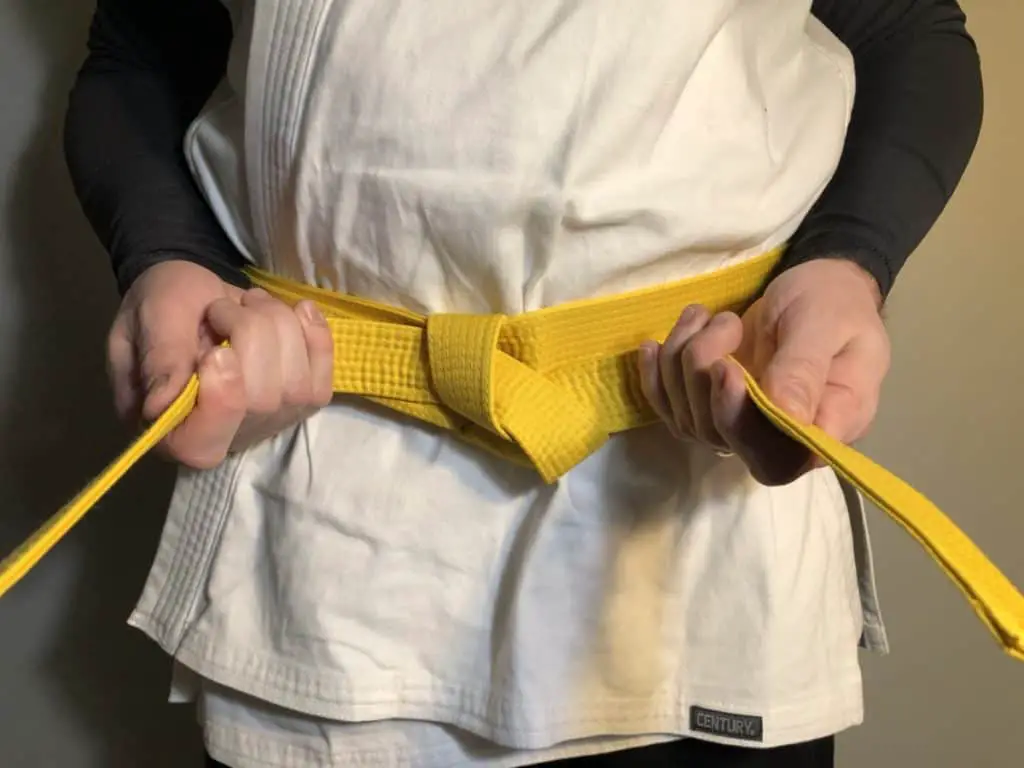
#4 Pull it through and grasp both ends without allowing the belt to twist in the knot. Keep the belt flat as you tie it. Get! You are ready to Yank!
#5 Two are three good, quick yanks will secure it nicely. Make sure you can fit your hands in between the belt and your stomach to allow for heavy breathing.
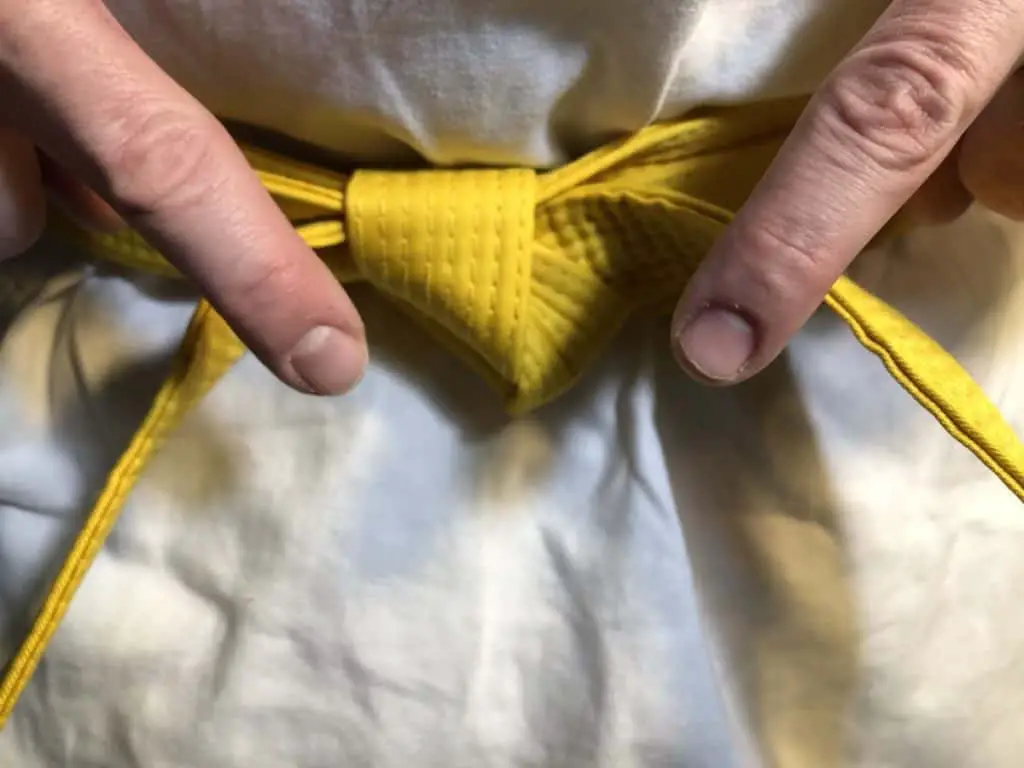
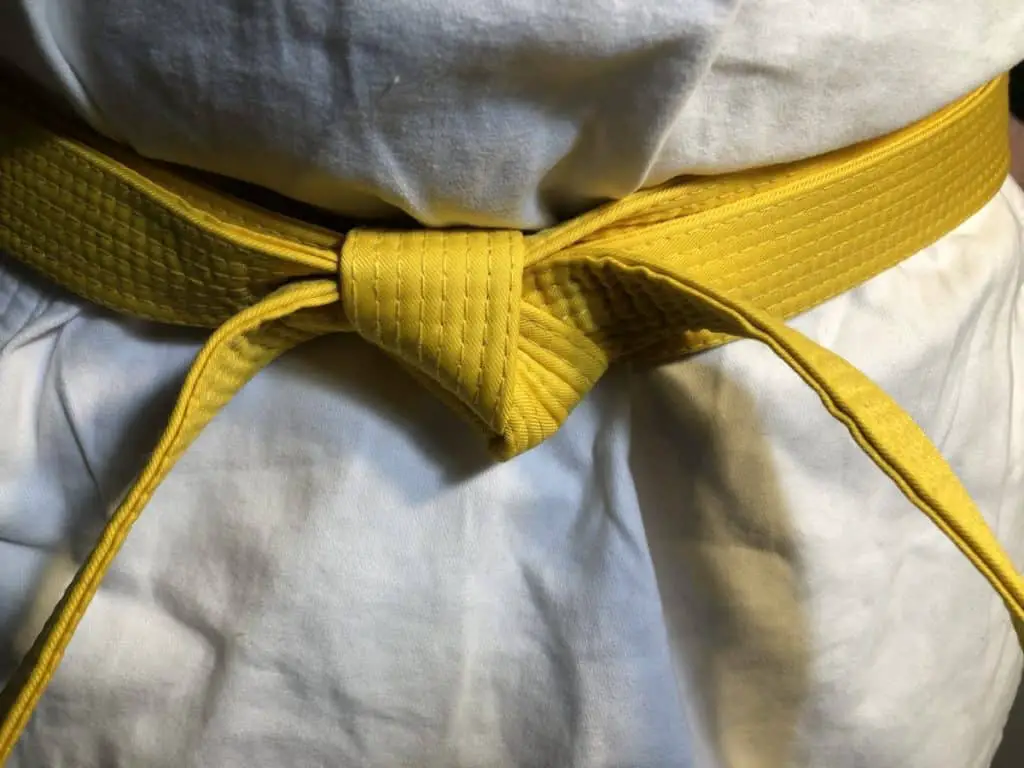
#6 Make sure the knot makes a V shape pointing downward in order for it to stay tied and not cause one of the belt sides to point upwards. Please no upwards reaching, odd looking belts. It is just… No.
Yeah, But How Do I Tie The Belt For My Child? It’s All Backwards.
I have a very good answer for this. It is so simple you won’t believe you didn’t think of it before. You ready?
Sit behind them in a chair or kneel.
Now, just tie it the same way you would tie it given any of the other explanations above. Tying the belt on them from behind fixes the problem of it all being backwards.
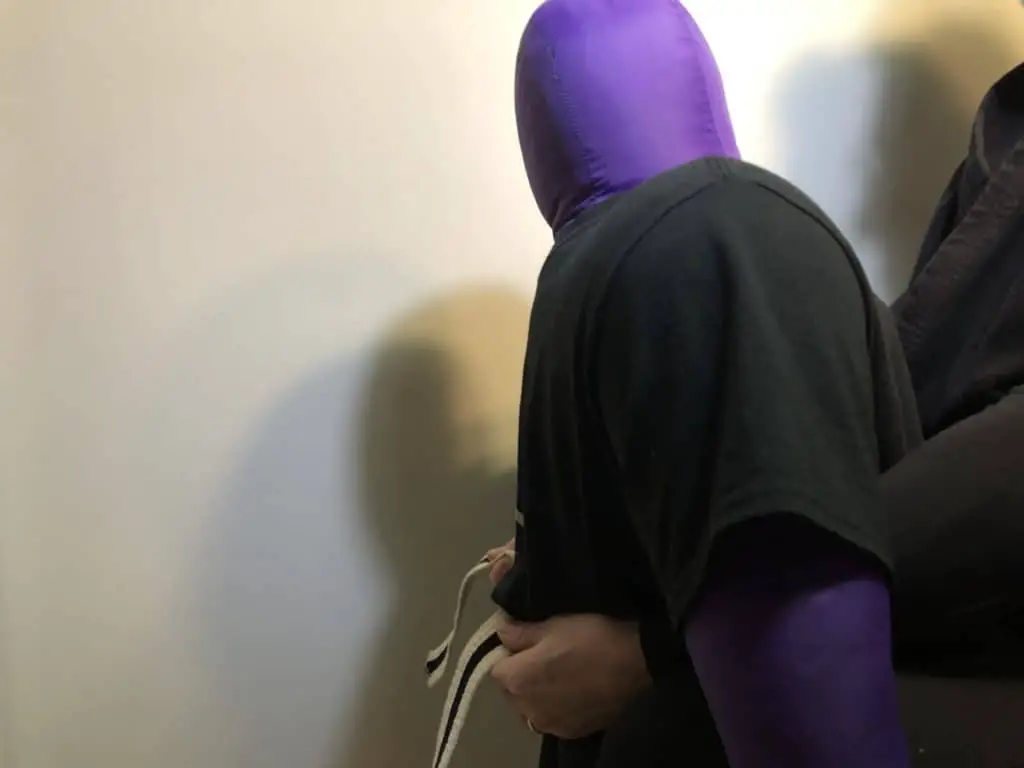
I can show you with my friend Buddy. Of course he is not in his super villain role at the moment. (Kids attack him on sight!) He is the size of a small child and I am in a sitting position here. If you need to look, just look over the shoulder.
Buddy is my constant companion and if you would like to see where I got him, check out his page on Amazon. Most other throwing or grappling dummies come unfilled. He was filled and ready to go.
If you would like more recommendations for how to help you and your Little Ninja train at home, check out my recommended gear packages here.
You can have them lift their arms out to the sides or not. It works either way. Just look over one of their shoulders and it will be very similar in look and feel to tying your own belt.
I have done this over 1,000,000 times. That is the honest truth. You can follow all the steps of any regular description of belt tying by kneeling, or even better in a chair.
If you want to tie their belt sitting in a chair, just have them stand slightly between your legs and you are ready to tie. There is no need to reverse engineer the tying process.
Just be warned that leaning over them from standing, though simpler and faster will be murder on sore or injured backs.
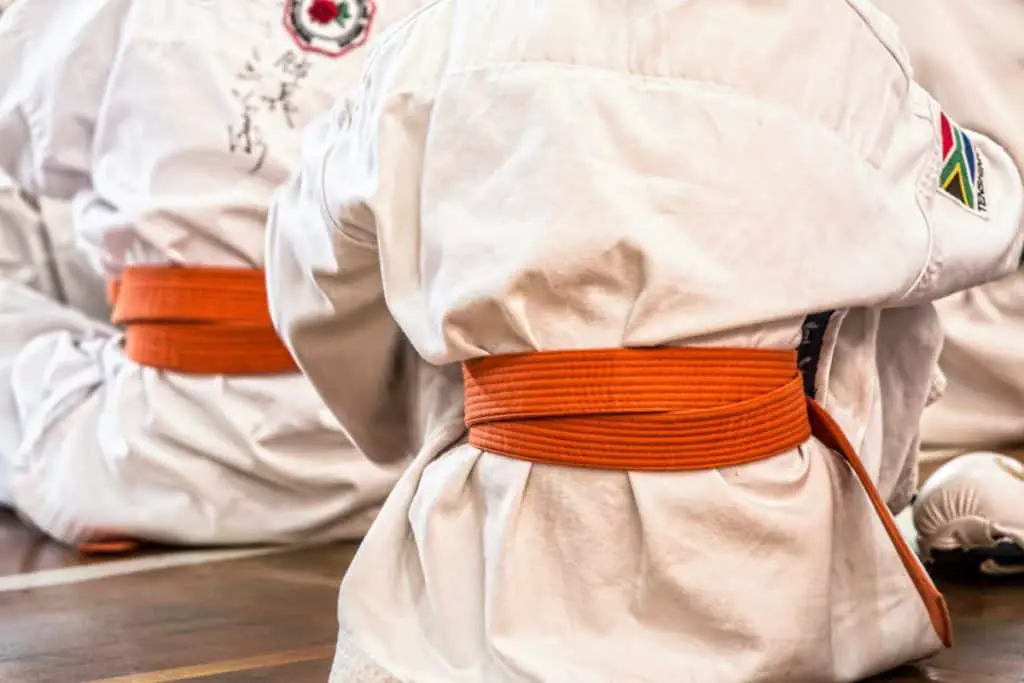
What If There Are Stripes or Text On the Belt?
So, in my style of martial arts we require that the stripes for Dan rankings end up on the right half of the finished hanging belt. We require that any writing end up on the left side.
To accomplish this with the X wrap variation, start off having whatever side you want to end up on the right… on the left. Whatever side you want to end up on the left… start with it on the right. So, just start while finding the center point of the belt, before you put it just below the navel, with the sides you want in the opposite positions.
Then when you tie the belt they will have switched and you are good to go. Of course, you will have to know or check with your instructor to find out which side any stripes or text should be on for your specific Dojo or Dojang.
If you are wanting to use the double wrap method, the same thing applies. Start with the side you want to end up with on the right. It will be pointing downward and to the left in the beginning, but end up on the right in the end.
Quick and simple tips for lining up which side the text or stripes will end up on…
- Start either wrap process with the text or stripes on the opposite side you want them to end up on.
- Wrap and tie as listed above.
- Done!
Issues Solved For Different Types of Gis and Doboks
There is a difference in the types of Gis that some students will have to tie their belts around. Some are thin and some are extra thick. Some have flapped openings in the front and some will have a V neck. Here is a rundown of any issues that you may come across.
Thicker Grappling Gis
For grappling Gis that are made extra thick to hold up to pulling and grasping: These don’t really pose a real problem tying the belt per se. I would just be careful due to the excess heat that is kept next to the body by these Gis not to wrap the belt too tightly.
I wrap my belt a little looser for grappling and secure the knot a little more with hard, snapping jerks to address this. It allows the front of the Judo or Jiu jitsu Gi to be open a bit more and allow for airflow.
Of course, some Judoka here will say that this gives the opponent more gripping space. I never had a problem and scored my fair share.
Open Front Gis
The opening in grappling Gi’s will have to be dealt with while tying the belt though, since they tend to want to fall open in the middle of the process. The X wrap version is good for this since immediately the middle of the belt holds it closed.
With the double wrap version, it will be much the same, but slightly trickier to hold it closed and wrap the entire rest of the belt around. You will soon get the hang of it though if that is your preferred method.
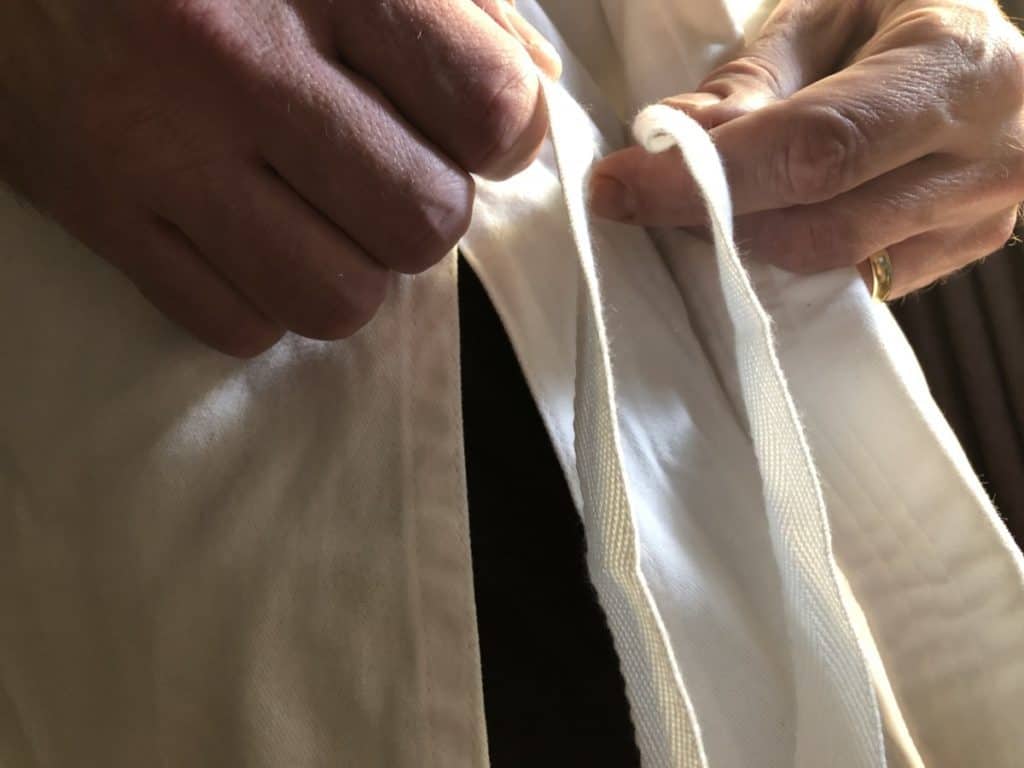
Some open front Gis come with strings that you can use to tie it closed. These can be useful to newer students, or for instructors wearing a Gi around an office for an hour or two (open front Gis come open easily when sitting in chairs).
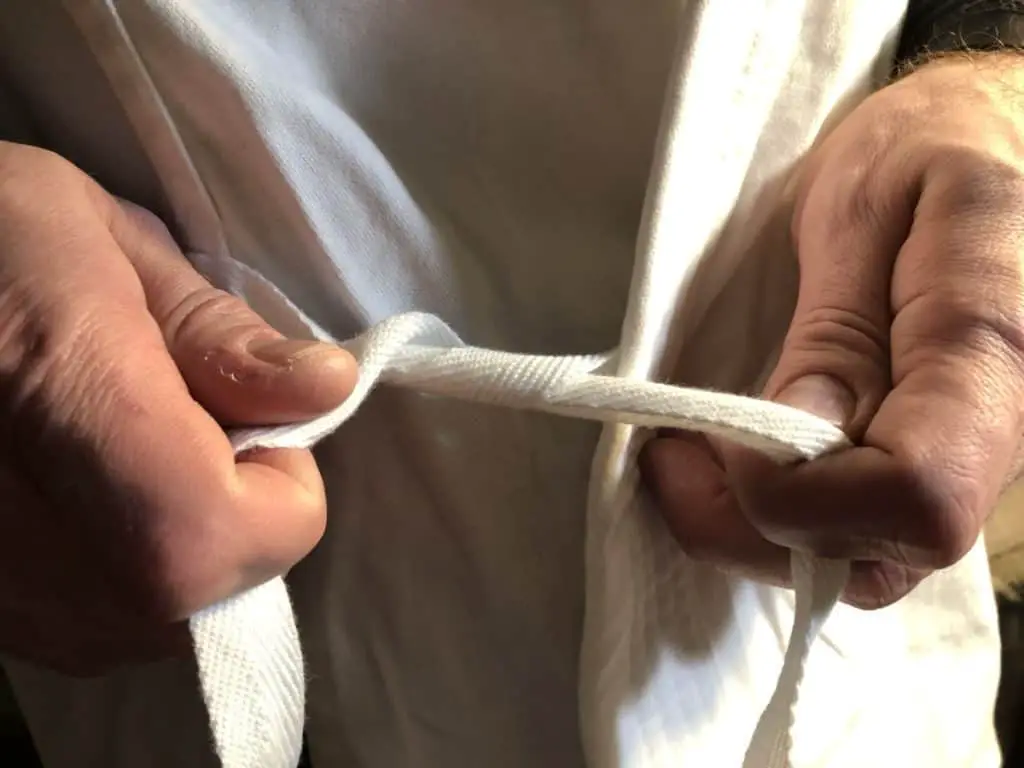
But using them when any sort of grabbing or grappling will be done is a quick way to get them snapped off, and maybe a hole in the uniform. If they come on your open front Gi, tie them so they don’t look tacky hanging down, but remember to untie them before wrestling or throwing practice of any kind begins.

V Neck Dobok
Here you will not find any issue with the Gi opening, which is one reason I think we see more Korean style martial artists using the double wrap version. It is slightly trickier to double wrap with an open faced Gi. With a V neck Dobok it is a piece of cake.
The Karate Belt Tying Takeaway…
There are some things to keep in mind when tying a Karate belt. But soon you will be tying it on the run, without thinking about it. Here are some of the highlights…
- Belts coming untied and falling off generally happen for 2 reasons
- The knot was not tight enough
- The wrap was too tight
- There are primarily 2 types of wraps to tying a Karate belt
- The X wrap with the crossover in the back
- The double wrap without a crossover
- The knot is a simple square knot with a simple mantra
- Left over right, underneath all of it
- Right over left, under just the first part
- Pull, Yank, Tug
- No need to reverse engineer the wrapping and tying for your Little Ninja
- Sit in a chair behind them with them between your knees
- Kneeling behind them works good as well
- When dealing with stripes or text on a belt, just start them off on the opposite side you want them to end up on and tie as normal